Create a Bootstrap Starter Theme in Eleventy
With the rise in the JAMStack way of thinking, there has been a lot of development in static site generators. One that is quickly gaining popularity is Eleventy. Eleventy is very similar to Jekyll, but compiles much faster because it’s built on Node. What makes Eleventy stand out is its simplicity and flexibility.
Eleventy was created to be a JavaScript alternative to Jekyll. It’s zero-config by default but has flexible configuration options. Eleventy works with your project’s existing directory structure.
Eleventy uses independent template engines. We don’t want to hold your content hostage. If you decide to use something else later, having your content decoupled in this way will make migration easier
In this tutorial I’m going to show you how to quickly set up a boilerplate Eleventy theme using Bootstrap as our CSS framework and Parcel as our bundler. The goal of this tutorial isn’t to build a fully themed website, but rather to create a simple boilerplate. The only assumption it makes is that you want to use Eleventy and Bootstrap.
Below is what we’ll create.
1. Initialize The Project and Install the Dependencies
-
Open up a new terminal window and run
npm initin a new directory . Follow the prompts and enter your info. In my case I rannpm initin a directory namedeleventy-bootstrap-starter-demo. I just used the default values.{ "name": "eleventy-bootstrap-starter-demo", "version": "1.0.0", "description": "", "main": "index.js", "scripts": { "test": "echo \"Error: no test specified\" && exit 1" }, "author": "", "license": "ISC" } - Install development dependencies by running
npm i @11ty/eleventy npm-run-all -D. -
Install Parcel by running
npm install -g parcel-bundler.- I chose Parcel because it’s a Blazing fast, zero configuration web application bundler. Essentially, it will bundle and compile our
jsandscssby default.
- I chose Parcel because it’s a Blazing fast, zero configuration web application bundler. Essentially, it will bundle and compile our
- Install project dependencies by running
npm i bootstrap jquery popper.js
2. Create Header and Footer Partials and a Site Variables File
Now that we have our dependencies installed, we can start building out our boilerplate theme. A good place to start is the header and footer partials, since these will be shared across all page templates.
-
In the root of your project, run the follow commands to create a blank header and footer partial. Note that it’s Eleventy Convention to put your partials in a
_includesdirectory.- Note that I chose to use Nunjucks, but Eleventy supports more template languages.
mkdir _includes mkdir _includes/shared touch _includes/shared/footer.njk touch _includes/shared/header.njk -
Create a data file to store site variables at ` _data/site.json
by running the following commands. Note that it's [Eleventy Convention](https://www.11ty.io/docs/data-js/) to store site variables in a_datadirectory. In our case we're adding defaulttitleanddescription` values to be loaded in the meta data of our site.
mkdir _data
touch _data/site.json
{
  "title": "Add the title of your website here. This is used in the <title></title>",
  "description": "Add your site description here. This is used in <meta name='description' content=''>"
}
3. Import Bootstrap
Now that we have a base, we can import Bootstrap as our framework of choice. Since we will be using Parcel as our bundler, we’re going to follow Parcel’s Bootstrap recipe.
-
In order to keep our assets organized, run the following commands in the root of your project to create the correct file structure.
mkdir _assets mkdir _assets/css mkdir _assets/css/vendor touch _assets/css/vendor/_bootstrap.scss -
Add the following to
_assets/css/vendor/_bootstrap.scss@import "./../../../node_modules/bootstrap/scss/bootstrap.scss"; -
In order to override Bootstrap’s default variables, run the following commands in the root of your project to create a
_bootstrap_overrides.scssfile. This is where you can override the default variables.mkdir _assets/css/base touch _assets/css/base/_bootstrap_overrides.scss -
As a note, I added the following to
_assets/css/base/_bootstrap_overrides.scss// Override Bootstraps Variables Here // Reference node_modules/bootstrap/scss/_variables.scss for a full list of variables // https://getbootstrap.com/docs/4.3/getting-started/theming/#variable-defaults -
Now that we have Bootstrap and our custom overrides file created, open up
_assets/css/main.scssand import the files.// Bootstrap Overrides @import "./base/bootstrap_overrides"; // Bootstrap @import "./vendor/bootstrap"; -
In order to load Bootstrap’s Popovers and Tooltips dependencies, run the following commands in the root of your project.
mkdir _assets/js mkdir _assets/js/vendor touch _assets/js/vendor/popover.js touch _assets/js/vendor/tooltip.js touch _assets/css/main.scss -
Open
_assets/js/vendor/popover.jsand add the following. This enables popovers everywhere.import $ from "jquery"; $(function () { $('[data-toggle="popover"]').popover(); }); -
Open
_assets/js/vendor/tooltip.jsand add the following. This enables tooltips everywhere.import $ from "jquery"; $(function () { $('[data-toggle="tooltip"]').tooltip(); }); -
Now we need to import all of our
jsandscssin to one file for Parcel to bundle. In the root of your project runtouch _assets/js/main.jsand add the following to the file.// Bootstrap JS and CSS import "bootstrap"; import "./../css/main.scss"; // Bootstrap Popover import "./vendor/popover"; // Bootstrap Tooltip import "./vendor/tooltip"; -
Now that we have a file for Parcel to bundle, we need to load that file into our project. Open up
_includes/shared/footer.njkwe created earlier and add the following:- I am getting this from Parcel’s Bootsrap Recipe.
<script src="./assets/main.js"></script> </body> </html> -
Open up
_includes/shared/header.njkwe created earlier and add the following:- We dynamically load the
<title>and<meta name="description">based on_data/site.json - We load the css via
<link rel="stylesheet" href="./assets/main.css">which will eventually be generated by Parcel.
<!DOCTYPE html> <html lang="en"> <head> <meta charset="UTF-8" /> <meta name="viewport" content="width=device-width, initial-scale=1.0" /> <meta http-equiv="X-UA-Compatible" content="ie=edge" /> <title>Steve Polito Design</title> <meta name="description" content="" /> <link rel="stylesheet" href="./assets/main.css" /> </head> <body></body> </html> - We dynamically load the
4. Create default layout
Now that we have everything wired up, we can create a default layout to use throughout our theme.
-
In the root of your project, run the follow commands.
mkdir _includes/layouts touch _includes/layouts/default.njk -
Open
_includes/layouts/default.njkand add the following:{% include "shared/header.njk" %} {{ content | safe }} {% include "shared/footer.njk" %}-
{% include ... %}is a supported template feature of Nunjucks. This is how we includeshared/header.njkandshared/footer.njkin the layout. -
{{ content | safe }}allows us to load escaped layouts.
-
-
Create a layout alias by running
touch .eleventy.js. Opentouch .eleventy.jsand add the following:module.exports = function (eleventyConfig) { eleventyConfig.addLayoutAlias("default", "layouts/default.njk"); }; -
Create an index page by running
touch index.njkand adding the following:--- layout: default title: Custom Title description: Custom Description ---- We can write
layout: defaultbecause we created a layout alias in.eleventy.js.
- We can write
5. Add Production and Development npm Scripts
Now that we have all of our files created, we need to tell our project how to compile. Since Eleventy and Parcel are two separate and independent command lines tools, we can use npm-run-all to run them in parallel.
- Open
package.jsonand add update thescriptssection.
"scripts": {
"start": "npm-run-all --parallel dev:_",
"build": "run-s prod:_",
"dev:eleventy": "eleventy --serve",
"dev:parcel": "parcel watch ./_assets/js/main.js --out-dir ./_site/assets",
"prod:eleventy": "eleventy",
"prod:parcel": "parcel build ./_assets/js/main.js --out-dir ./_site/assets"
},
-
"dev:eleventy": "eleventy --serve" -
dev:parcel": "parcel watch ./_assets/js/main.js --out-dir ./_site/assets"-
watch ./_assets/js/main.jswatches the entry point. -
--out-dir ./_site/assets- We need to put the compiled assets in the
_site/directory created be Eleventy. Otherwise it will just compile to adist/directory which Eleventy doesn’t know about. More information on –out-dir can be found here.
- We need to put the compiled assets in the
-
-
"prod:eleventy": "eleventy"- Builds the Eleventy site.
-
"prod:parcel": "parcel build ./_assets/js/main.js --out-dir ./_site/assets"- Minifies scripts and styles and places them in the
_site/directory create be Eleventy.
- Minifies scripts and styles and places them in the
-
"start": "npm-run-all --parallel dev:*"runs all scripts that start withdev: -
"build": "run-s prod:*"runs all scripts that start withprod:
6. Ignore Specific Files and Folders Generated by Eleventy, Parcel and npm
- In the root of your project, run
touch .gitignore. Open.gitignoreand add the following to ignore files and folders generated by Eleventy, Parcel and npm
node_modules
.cache
_site
7. Load Test Elements on the Page To Ensure Everything Is Working Correctly
-
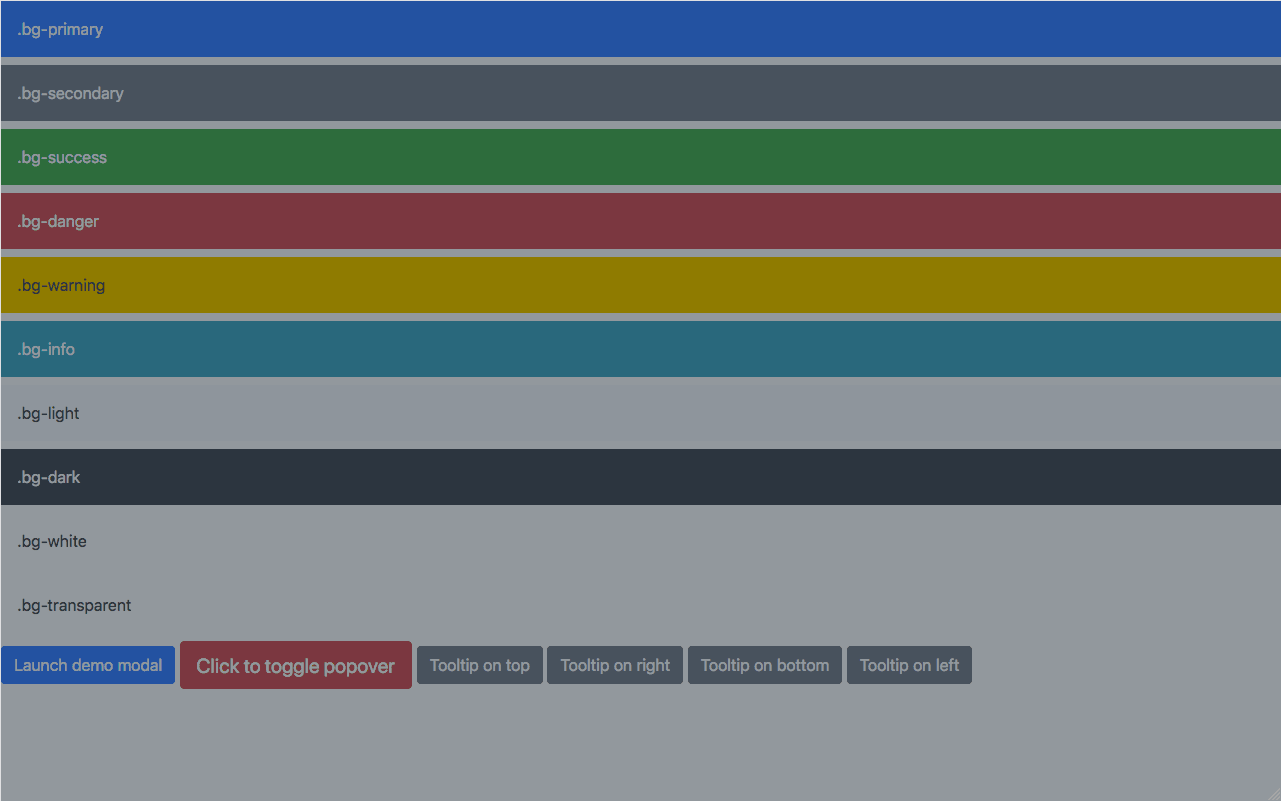
Open
index.njxand add the following:<div class="bd-example"> <div class="p-3 mb-2 bg-primary text-white">.bg-primary</div> <div class="p-3 mb-2 bg-secondary text-white">.bg-secondary</div> <div class="p-3 mb-2 bg-success text-white">.bg-success</div> <div class="p-3 mb-2 bg-danger text-white">.bg-danger</div> <div class="p-3 mb-2 bg-warning text-dark">.bg-warning</div> <div class="p-3 mb-2 bg-info text-white">.bg-info</div> <div class="p-3 mb-2 bg-light text-dark">.bg-light</div> <div class="p-3 mb-2 bg-dark text-white">.bg-dark</div> <div class="p-3 mb-2 bg-white text-dark">.bg-white</div> <div class="p-3 mb-2 bg-transparent text-dark">.bg-transparent</div> </div> <!-- Button trigger modal --> <button type="button" class="btn btn-primary" data-toggle="modal" data-target="#exampleModal" > Launch demo modal </button> <!-- Modal --> <div class="modal fade" id="exampleModal" tabindex="-1" role="dialog" aria-labelledby="exampleModalLabel" aria-hidden="true" > <div class="modal-dialog" role="document"> <div class="modal-content"> <div class="modal-header"> <h5 class="modal-title" id="exampleModalLabel">Modal title</h5> <button type="button" class="close" data-dismiss="modal" aria-label="Close" > <span aria-hidden="true">×</span> </button> </div> <div class="modal-body">...</div> <div class="modal-footer"> <button type="button" class="btn btn-secondary" data-dismiss="modal"> Close </button> <button type="button" class="btn btn-primary">Save changes</button> </div> </div> </div> </div> <button type="button" class="btn btn-lg btn-danger" data-toggle="popover" title="Popover title" data-content="And here's some amazing content. It's very engaging. Right?" > Click to toggle popover </button> <button type="button" class="btn btn-secondary" data-toggle="tooltip" data-placement="top" title="Tooltip on top" > Tooltip on top </button> <button type="button" class="btn btn-secondary" data-toggle="tooltip" data-placement="right" title="Tooltip on right" > Tooltip on right </button> <button type="button" class="btn btn-secondary" data-toggle="tooltip" data-placement="bottom" title="Tooltip on bottom" > Tooltip on bottom </button> <button type="button" class="btn btn-secondary" data-toggle="tooltip" data-placement="left" title="Tooltip on left" > Tooltip on left </button> -
Make sure the modal, tooltips and popovers work.
Conclusion and Next Steps
Now you can override Bootstrap’s variables in _assets/css/base/_bootstrap_overrides.scss to create a more customized theme. I’ve found that by doing this and using Utilities you can create custom and unique layouts that don’t resemble Bootstrap.