Real-time Form Validation in Ruby on Rails
Learn how to validate a form in real-time while conditionally preventing it from being submitted.
Step 1: Initial Set Up
rails new rails-real-time-form-validation --webpack=stimulusrails g scaffold Post title body:textrails db:migrate
Step 2: Add Validations to Post Model
# app/models/post.rb

class Post < ApplicationRecord
  validates :body, length: { minimum: 10 }
  validates :title, presence: true
end
Step 3: Create Form Validation Endpoint
rails g controller form_validations/posts-
Update controller to inherit from
PostsController# app/controllers/form_validations/posts_controller.rb class FormValidations::PostsController < PostsController def update @post.assign_attributes(post_params) @post.valid? respond_to do |format| format.text do render partial: "posts/form", locals: { post: @post }, formats: [:html] end end end def create @post = Post.new(post_params) @post.validate respond_to do |format| format.text do render partial: "posts/form", locals: { post: @post }, formats: [:html] end end end endWhat’s Going On?
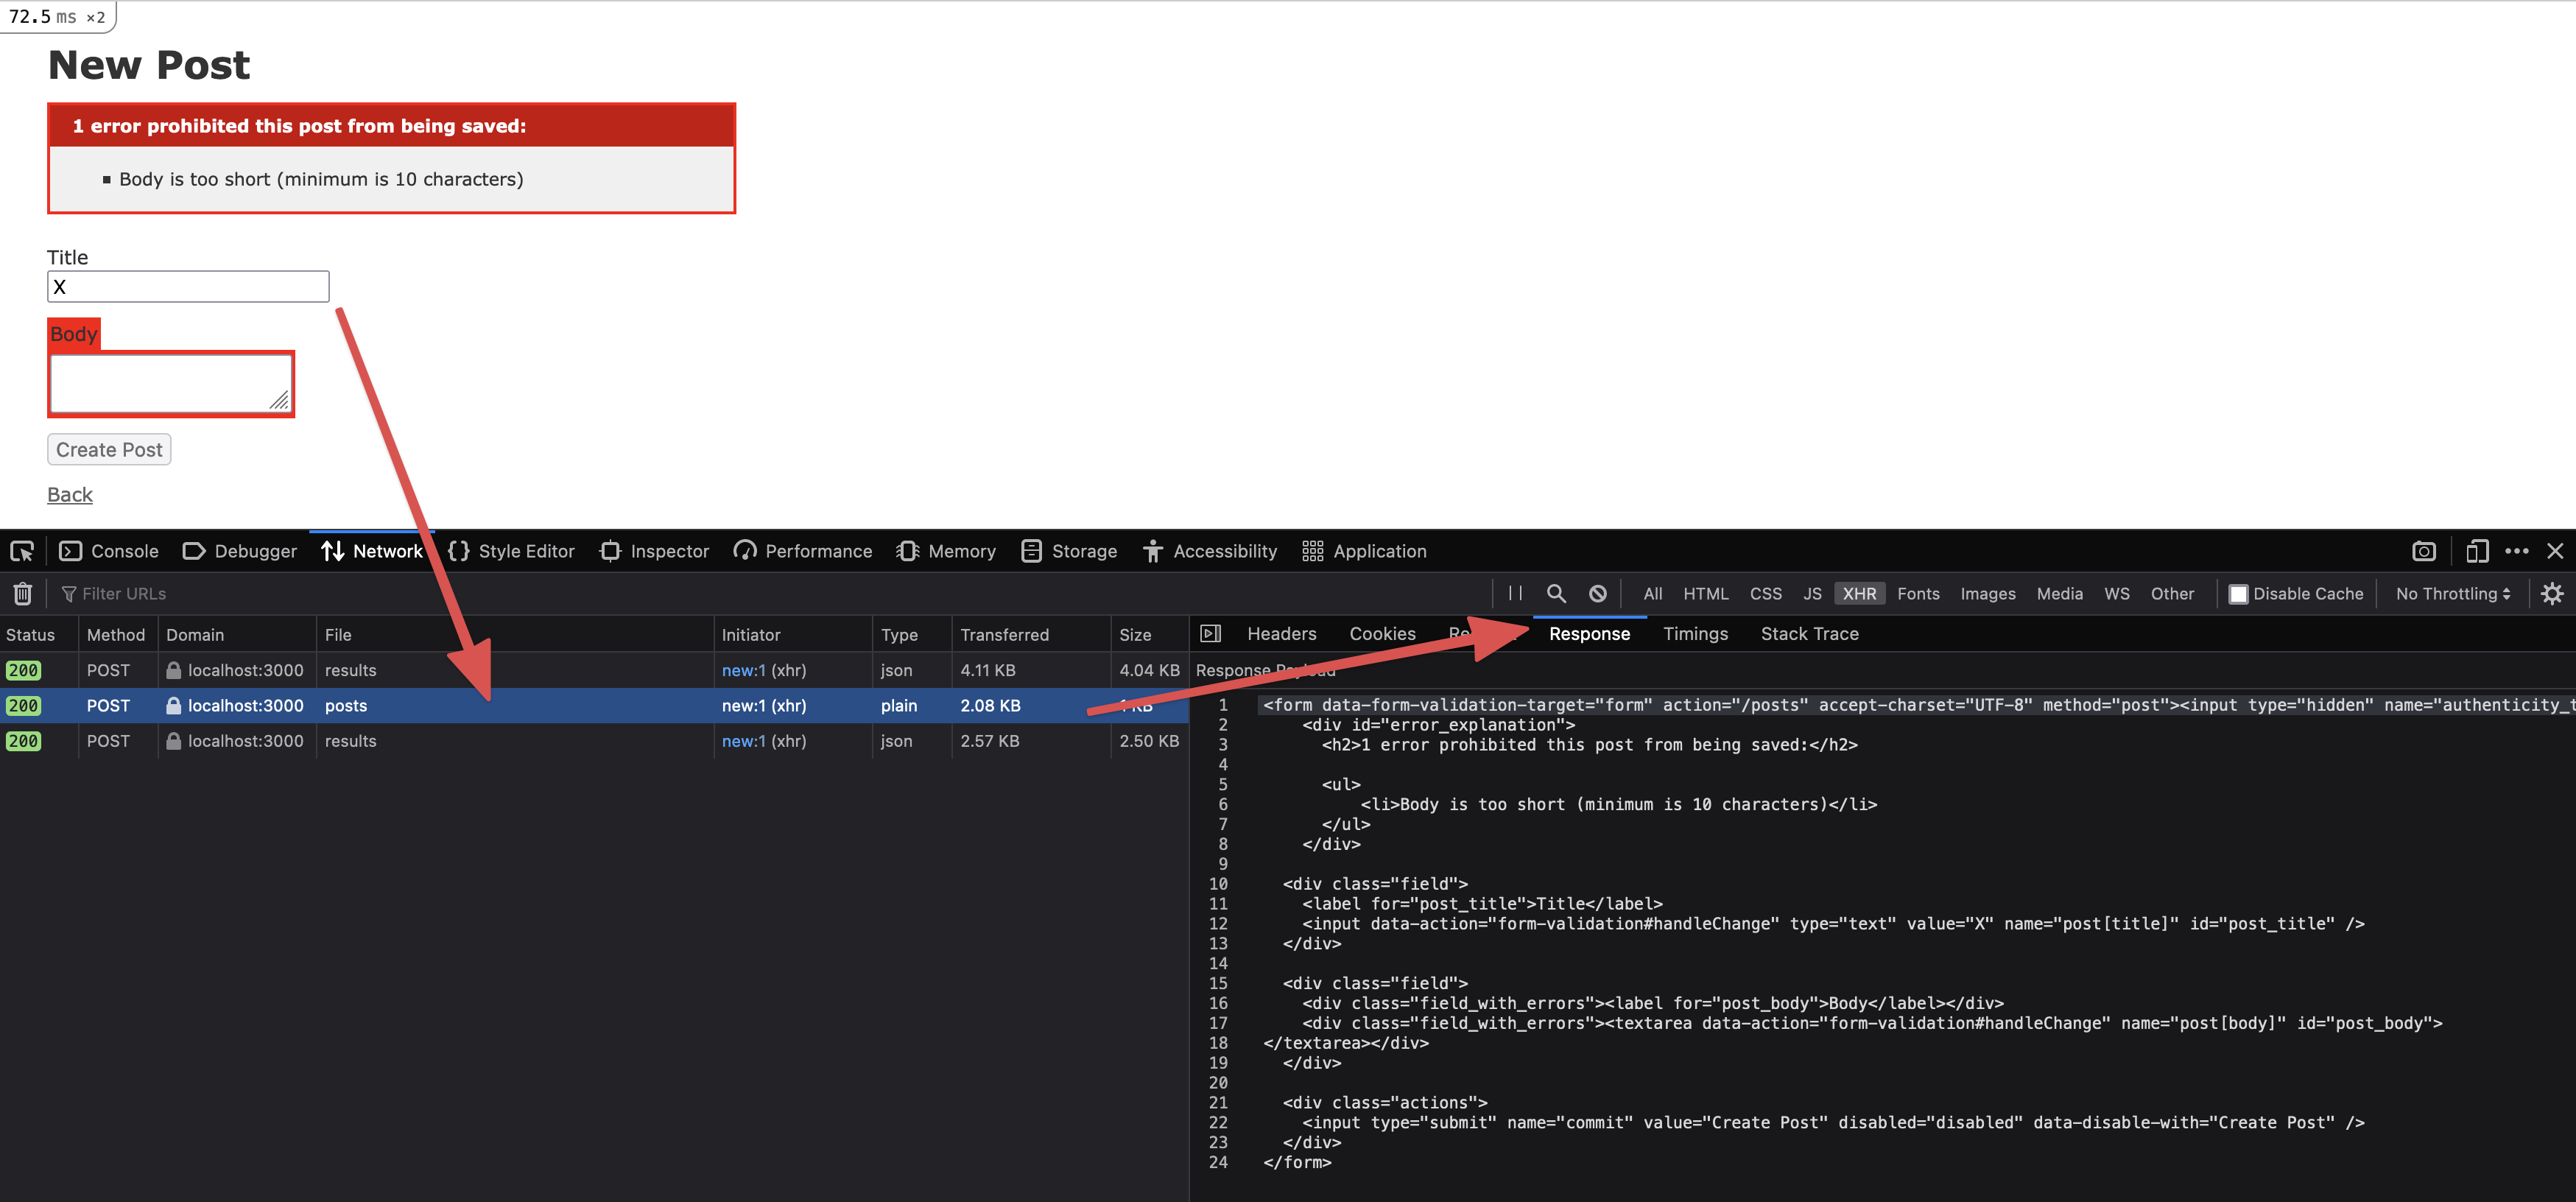
When we hit this endpoint we return the form partial as response from the server. The form partial already handles the logic needed to render errors.
- We have access to
post_paramsbecuase we inherit fromPostsController - We call assign_attributes in the
updateaction because we don’t actually want to update the record in the database. We just want to update the record in memory so that we can have it validated. - We call
@post.valid?and@post.validatein theupdateandcreateactions respectively to ensure any validation errors get sent to the partial. - We respond
textand notjsonbecause we would need to format the response with akeyto hold the markup. This way is easier. We passformats: [:html]to ensure the correct partial is rendered. Othwerwise Rails would look for_form.text.erb.
- We have access to
-
Create a namespaced route for the endpoints.
# config/routes.rb

Rails.application.routes.draw do
  resources :posts
  namespace :form_validations do
    resources :posts, only: %i[create update]
  end
end
What’s Going On?
We don’t have to namespace this controller and route, but it keeps things organized. This will make it easier to create additional enpoints for other forms. There’s probably an opportunity to use metaprogramming and concerns, but for now this works.
Step 4: Create Stimulus Controller
-
touch app/javascript/controllers/form_validation_controller.js// app/javascript/controllers/form_validation_controller.js import Rails from "@rails/ujs"; import { Controller } from "stimulus"; export default class extends Controller { static targets = ["form", "output"]; static values = { url: String }; handleChange(event) { Rails.ajax({ url: this.urlValue, type: "POST", data: new FormData(this.formTarget), success: (data) => { this.outputTarget.innerHTML = data; }, }); } }What’s Going On?
This Stimulus Controller simply hits the endpoint we created and updates the DOM with the response.
- We import
Railsin order to useRails.ajax - We set the
urlto the value we will pass todata-form-validation-url-valuekeepig thing flexible. - We set the
typetoPOSTto ensure we’re always make aPOSTrequest to the endpoint. - We set the
datatonew FormData(this.formTarget)wich simply takes all the values from the form.- Note that this includes the hidden method input which will account for
PATCHrequsts. This is why we need to havecreateandupdateactions on our controller.
- Note that this includes the hidden method input which will account for
- We import
-
Update markup.
<%# app/views/posts/_form.html.erb %>
<%= form_with(model: post, data: { form_validation_target: "form" }) do |form| %>
  <% if post.errors.any? %>
  <div id="error_explanation">
    <h2><%= pluralize(post.errors.count, "error") %> prohibited this post from being saved:</h2>
    <ul>
      <% post.errors.each do |error| %>
        <li><%= error.full_message %></li>
      <% end %>
    </ul>
  </div>

  <% end %>
  <div class="field">
    <%= form.label :title %>
    <%= form.text_field :title, data: { action: "form-validation#handleChange" } %>
  </div>

  <div class="field">
    <%= form.label :body %>
    <%= form.text_area :body, data: { action: "form-validation#handleChange" } %>
  </div>

  <div class="actions">
    <%= form.submit disabled: post.errors.any?  %>
  </div>
<% end %>
What’s Going On?
- We add a target to our form in order to easily send the form data to the endpoint through our controller.
- We add an action to any input we want to listen to. When the change event is fired we hit our endpoint.
- We conditionally disable the form by adding
disabled: post.errors.any?to the submit button.
<%# app/views/posts/new.html.erb %>

<h1>New Post</h1>

<div data-controller="form-validation" data-form-validation-target="output" data-form-validation-url-value="<%= form_validations_posts_path %>">
  <%= render 'form', post: @post %>
</div>

<%= link_to 'Back', posts_path %>
<%# app/views/posts/edit.html.erb %> <h1>Editing Post</h1> <div data-controller="form-validation" data-form-validation-target="output" data-form-validation-url-value="<%= form_validations_post_path(@post) %>"> <%= render 'form', post: @post %> </div> <%= link_to 'Show', @post %> | <%= link_to 'Back', posts_path %>
If you open your browser and navigate to http://localhost:3000/posts/new you can inspect the response from the server and see our work in progress.
Step 5: Debounce Requests
yarn add lodash.debounce
// app/javascript/controllers/form_validation_controller.js
import Rails from "@rails/ujs";
import { Controller } from "stimulus";
const debounce = require("lodash.debounce");

export default class extends Controller {
  static targets = ["form", "output"];
  static values = { url: String };

  initialize() {
    this.handleChange = debounce(this.handleChange, 500).bind(this);
  }

  handleChange(event) {
    Rails.ajax({
      url: this.urlValue,
      type: "POST",
      data: new FormData(this.formTarget),
      success: (data) => {
        this.outputTarget.innerHTML = data;
      },
    });
  }
}
What’s Going On?
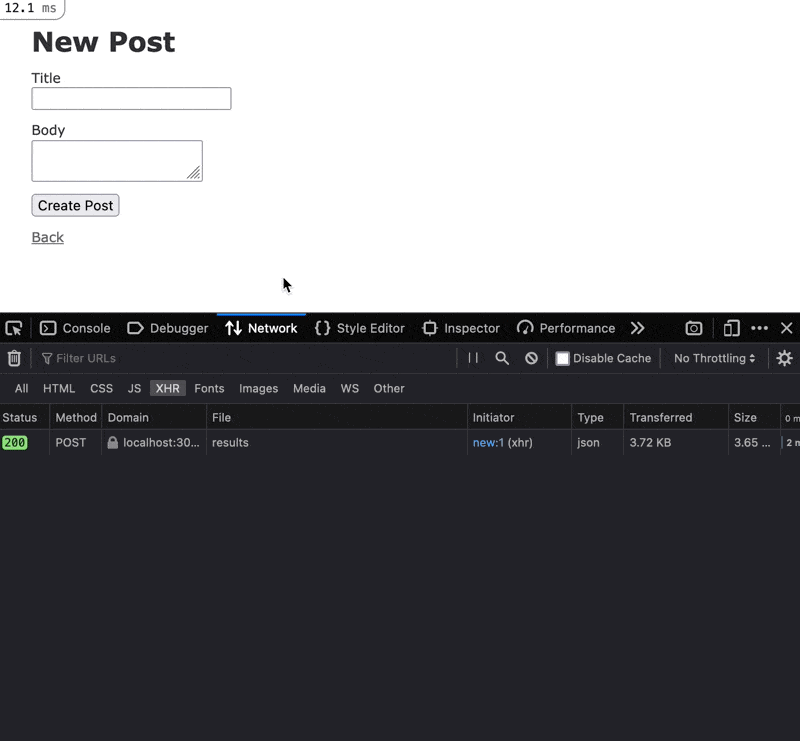
Over server is hit everytime someone types into this form unless we debounce these requests. By debouncing these requests we reduce the load on the server, and also reduce some jank on the form.
If you open your browser and navigate to http://localhost:3000/posts/new you can inspect the response from the server and see that only one request was made instead of one per keystroke.
Step 6: Focus Input
You might have noticed that each time the form validates, the cursor is no longer focused on the input. Let’s fix that.

import Rails from "@rails/ujs";
import { Controller } from "stimulus";
const debounce = require("lodash.debounce");

export default class extends Controller {
  static targets = ["form", "output"];
  static values = { url: String };

  initialize() {
    this.handleChange = debounce(this.handleChange, 500).bind(this);
  }

  handleChange(event) {
    let input = event.target;
    Rails.ajax({
      url: this.urlValue,
      type: "POST",
      data: new FormData(this.formTarget),
      success: (data) => {
        this.outputTarget.innerHTML = data;
        input = document.getElementById(input.id);
        this.moveCursorToEnd(input);
      },
    });
  }

  // https://css-tricks.com/snippets/javascript/move-cursor-to-end-of-input/
  moveCursorToEnd(element) {
    if (typeof element.selectionStart == "number") {
      element.focus();
      element.selectionStart = element.selectionEnd = element.value.length;
    } else if (typeof element.createTextRange != "undefined") {
      element.focus();
      var range = element.createTextRange();
      range.collapse(false);
      range.select();
    }
  }
}
What’s Going On?
- We store the focused
inputas a variable by callinglet input = event.target.- We do this because the form’s makrup get’s replaced after the request to the server is made. This allows is to still reference the
inputlater by callinginput = document.getElementById(input.id);. There’s probably a better way to do this, but it works.- We can’t just call focus() on the
inputbecause it will place the cursor at the beginning. Fortunately a quick internet search lead me to this solution.- Note that I added
element.focus();aftertypeof element.selectionStart == "number".
If you open your browser and navigate to http://localhost:3000/posts/new you’ll see that the cursor is placed at the end.
