Redirect Domain Aliases to Your Primary Domain With Gatsby and Netlify
I recently redeveloped my website using Gatsby, and moved my hosting to Netlify. As part of the launch I wanted to redirect all requests from stevepolitodesign.com to my new stevepolito.design domain.
However, doing so required a bit more work than I had planned for. Below are the steps that need to be completed in order to redirect your domain aliases to your primary domain with Gatsby and Netlify.
1. Add Your Domain Aliases To Netlify
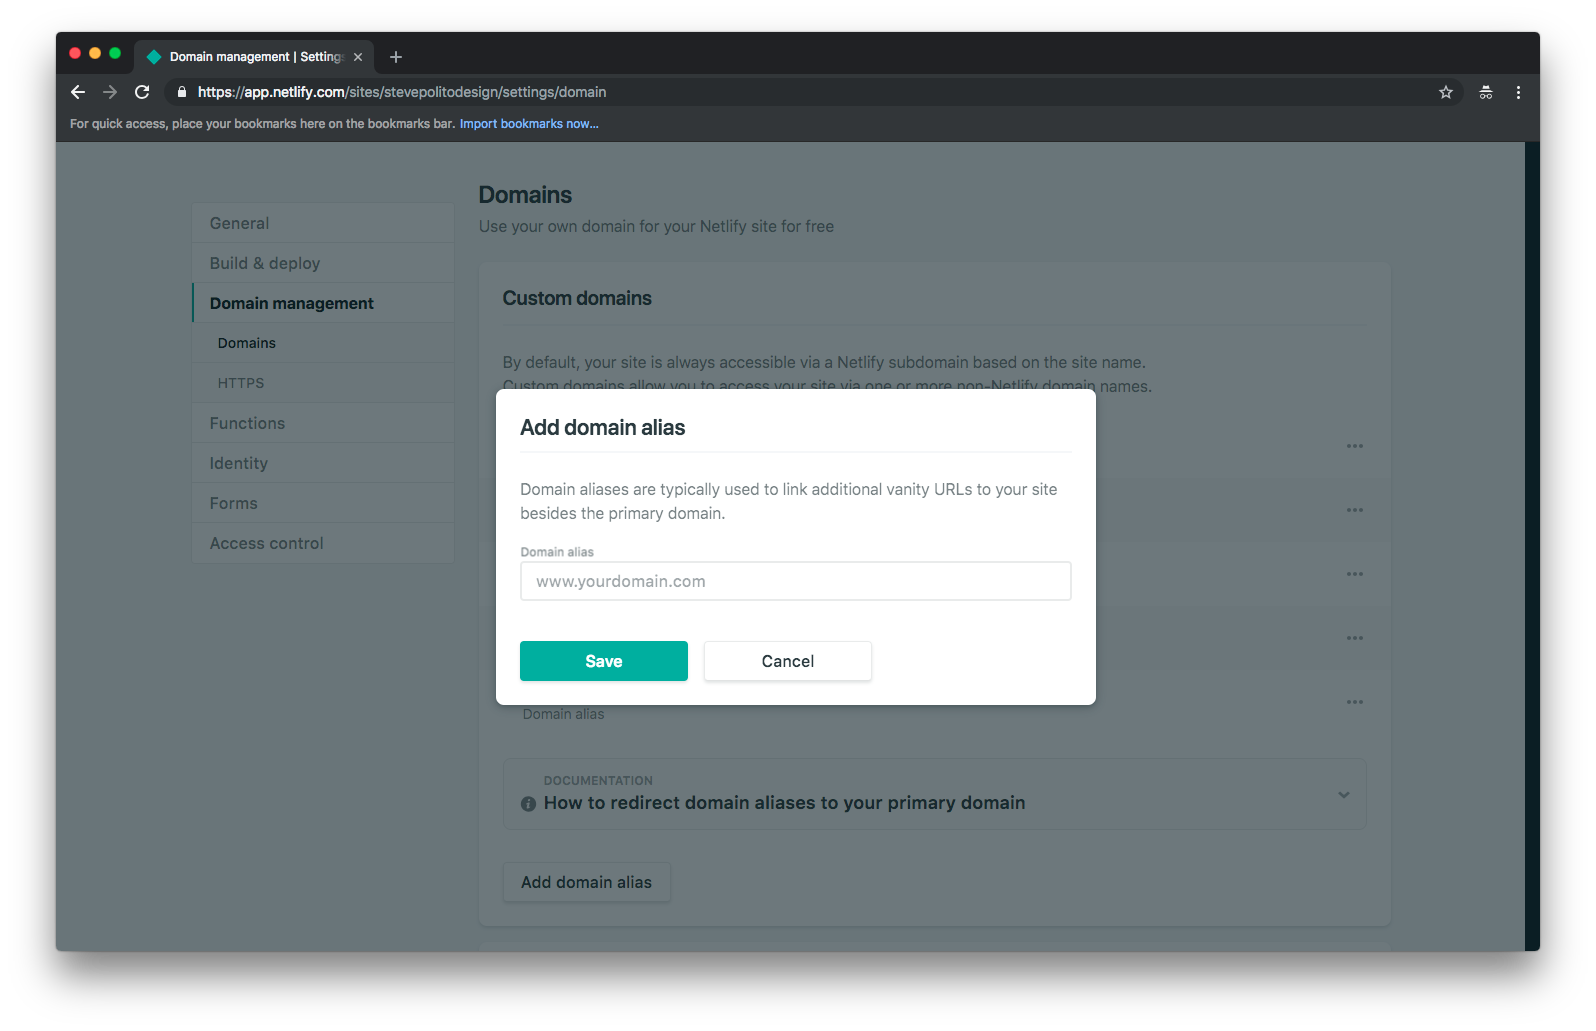
Before you can redirect your domain aliases to Netlify, you first need to add your domain aliases. Login to Netlify and navigate to the Domains tab under Domain Management.
From there, click the Add domain alias button. Add both the naked domain and the www domain. In my case I added stevepolitodesign.com and www.stevepolitodesign.com
Once you add you domain alias to Netlify, make sure to update the domain’s DNS to point to Netlify
2. Install Gatsby Netlify CMS Plugin
Gatsby is a static site generator. When you deploy to Netlify, a script runs to build the site and serve the files from the generated public directory. The problem with this is that you can’t simply edit the files in your local build. Why is this is a problem? Because in order to redirect domain aliases to your primary domain, you need to add a _redirect file to the root of your site.
Luckily the Gatsby Netlify CMS Plugin automatically adds the _redirect file to the root of your project during build.
Install the plugin by running npm install --save netlify-cms gatsby-plugin-netlify-cms. After you install the plugin, make sure it is added to gatsby-config.js.
module.exports = {
  siteMetadata: {
    title: "Steve Polito is a Full Stack Web Developer in the Boston Area",
    siteUrl: "https://stevepolito.design",
  },
  plugins: [...`gatsby-plugin-netlify`],
};
3. Use Version 2.0.47 or Newer of Gatsby
In order to get the next step to work, I needed to use version 2.0.47. This included a pull request to add support for setting a force redirect status in Netlify _redirects file.
4. Use the createRedirect API to Redirect Domain Aliases
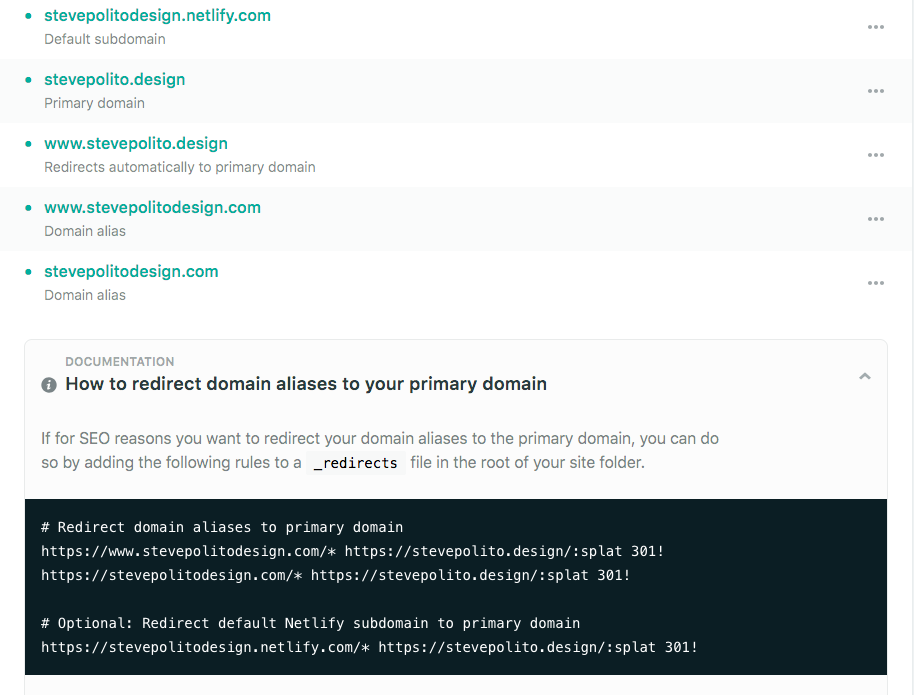
Now that you’ve installed the Gatsby Netlify CMS Plugin, you need to tell Gatsby what redirects to create. Login to Netlify and navigate to the Domains tab under Domain Management. Click How to redirect domain aliases to your primary domain to see the recommended redirect rules. In my case, Netlify gave me the following:
# Redirect domain aliases to primary domain

https://www.stevepolitodesign.com/_ https://stevepolito.design/:splat 301!
https://stevepolitodesign.com/_ https://stevepolito.design/:splat 301!

# Optional: Redirect default Netlify subdomain to primary domain

https://stevepolitodesign.netlify.com/* https://stevepolito.design/:splat 301!
Navigate to your gatsby-node.js file and add a createRedirect call for each domain alias. Make sure to add force: true. This new argument was introduced in a new version of Gatsby, which is why we needed to upgrade to at least 2.0.47. I also added isPermanent: true.
exports.createPages = ({ graphql, actions }) => {
  const { createPage, createRedirect } = actions;

  createRedirect({
    fromPath: "https://stevepolitodesign.com/*",
    toPath: "https://stevepolito.design/:splat",
    isPermanent: true,
    force: true,
  });
  createRedirect({
    fromPath: "https://www.stevepolitodesign.com/*",
    toPath: "https://stevepolito.design/:splat",
    isPermanent: true,
    force: true,
  });
};
5. Run Gatsby Build Locally
To make sure everything was working correctly, I ran a local build. Run gatsby build, and then confirm public/_redirects exists. Furthermore, make sure that the content in the file matches the settings from Netlify. Make sure that the status code is 301! and not just 301.
## Created with gatsby-plugin-netlify

https://stevepolitodesign.com/_ https://stevepolito.design/:splat 301!
https://www.stevepolitodesign.com/_ https://stevepolito.design/:splat 301!
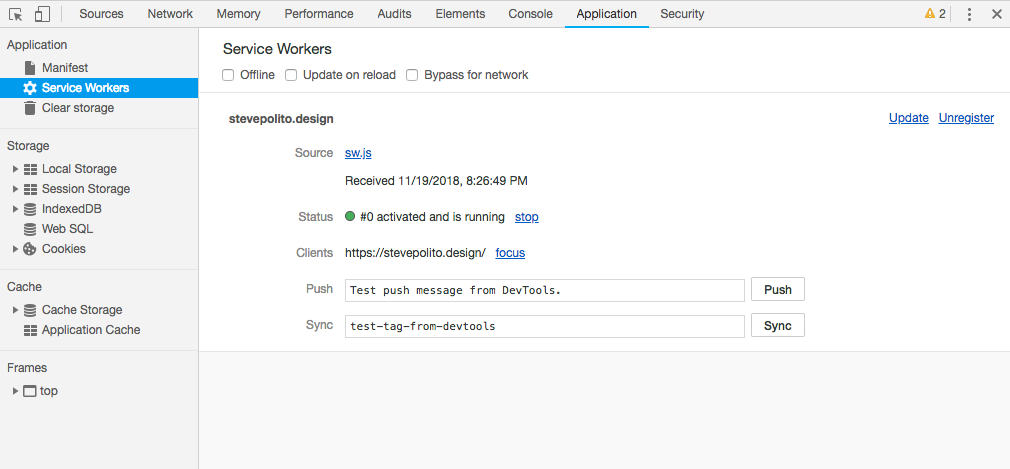
6. Push the Code to Netlify and Unregister the Service Worker
To make sure everything is working properly, push the code to Netlify. Once the build runs, open up Chrome Dev tools and unregister the service worker.